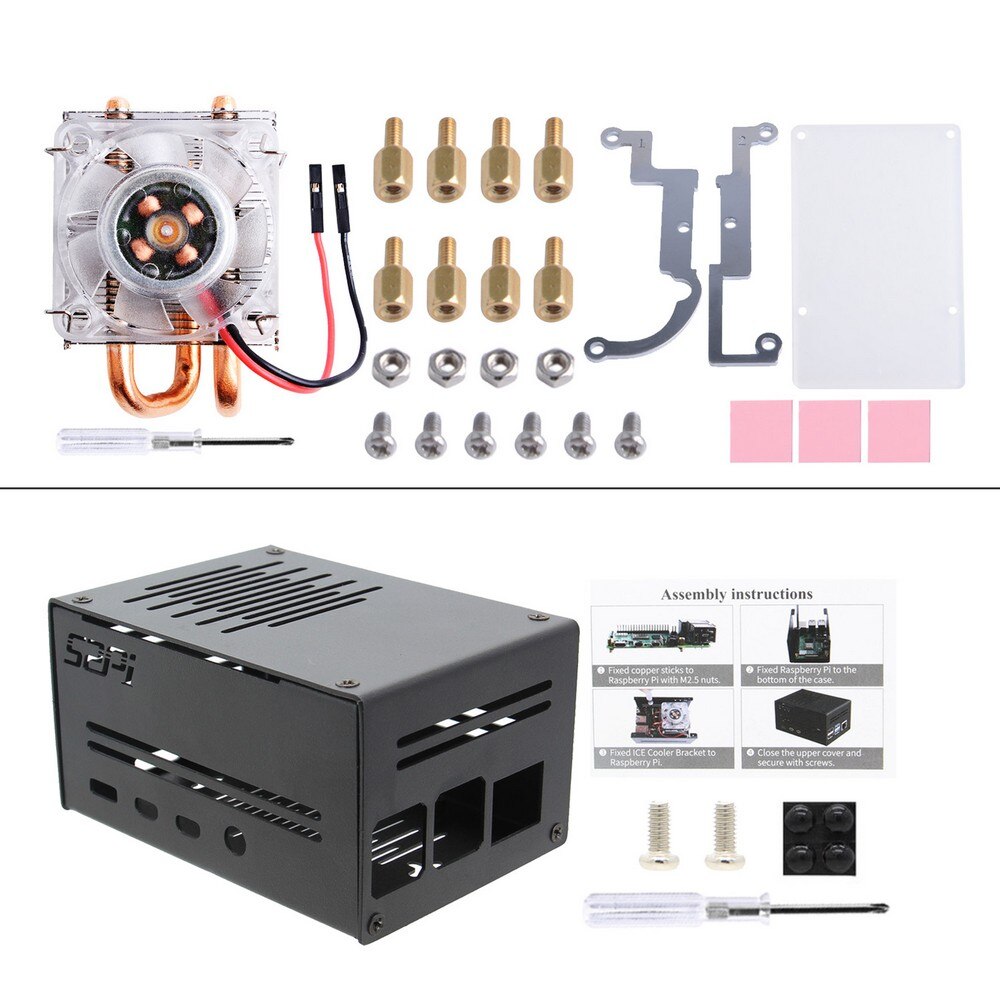


Raspberry Pi Case-LTRIG
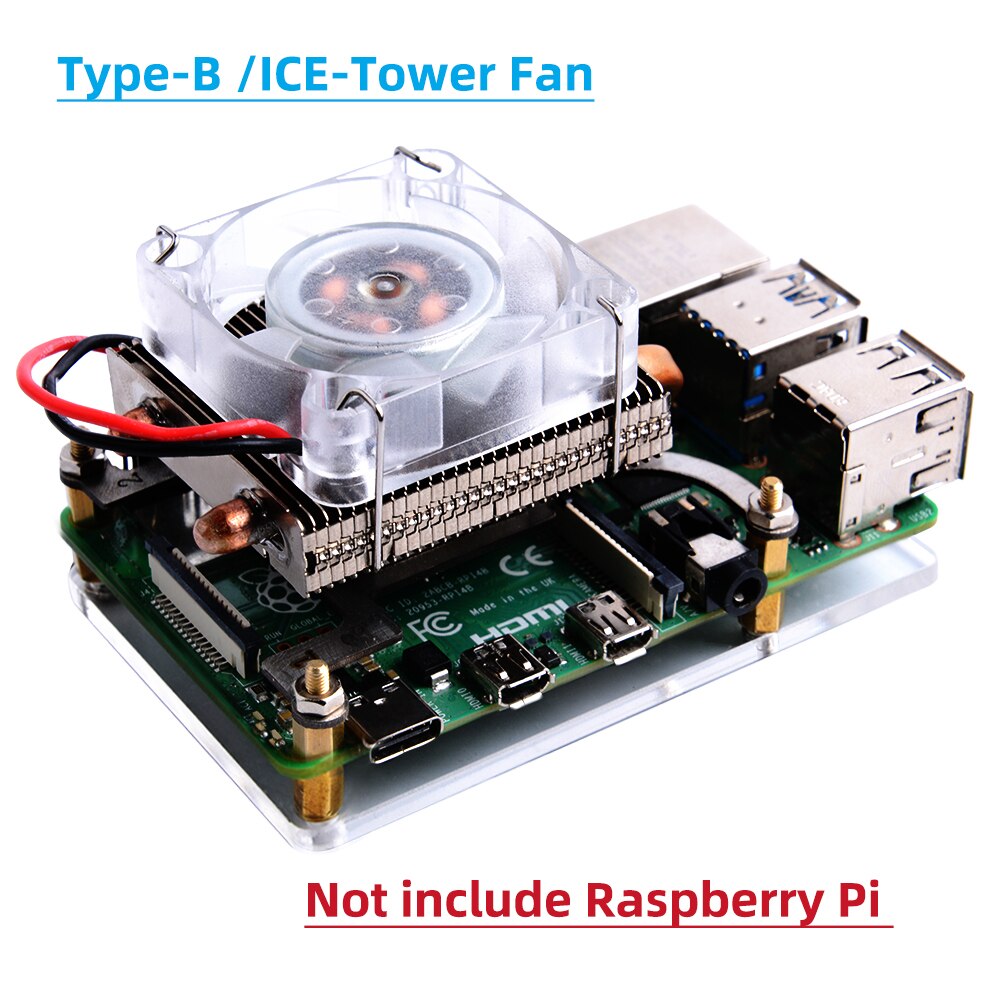
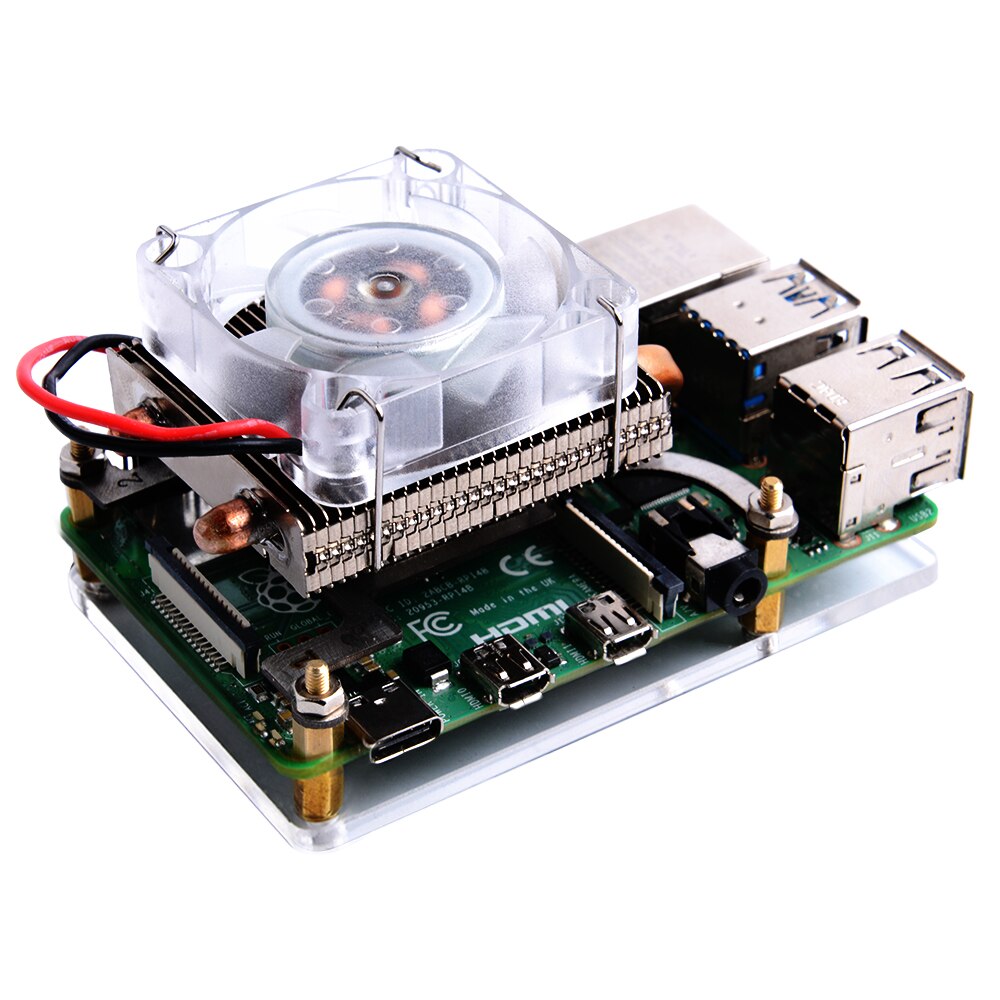
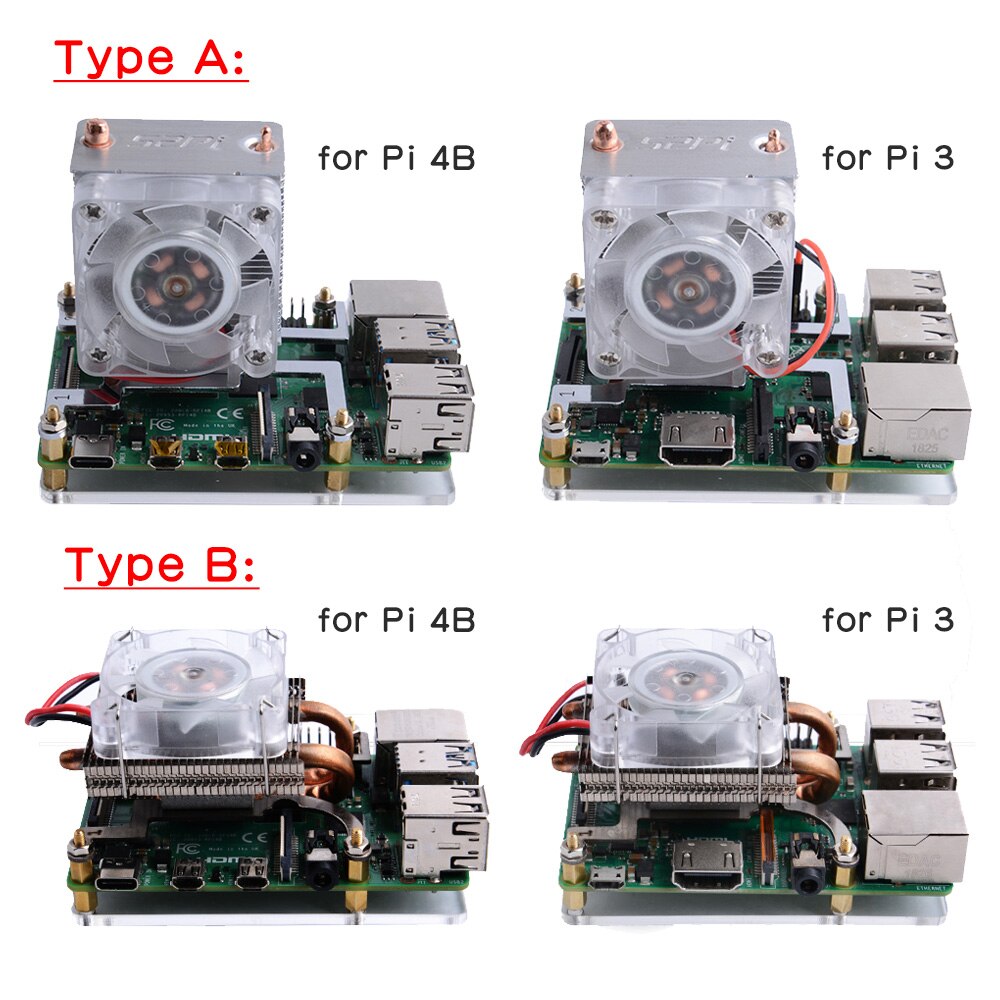
ICE-Tower Cooling Fan, Super Heat Dissipation for Raspberry Pi 4 Model B / 3B+ / 3B customize
ICE-Tower Cooling Fan, Super Heat Dissipation for Raspberry Pi 4 Model B / 3B+ / 3B customize
Couldn't load pickup availability
-
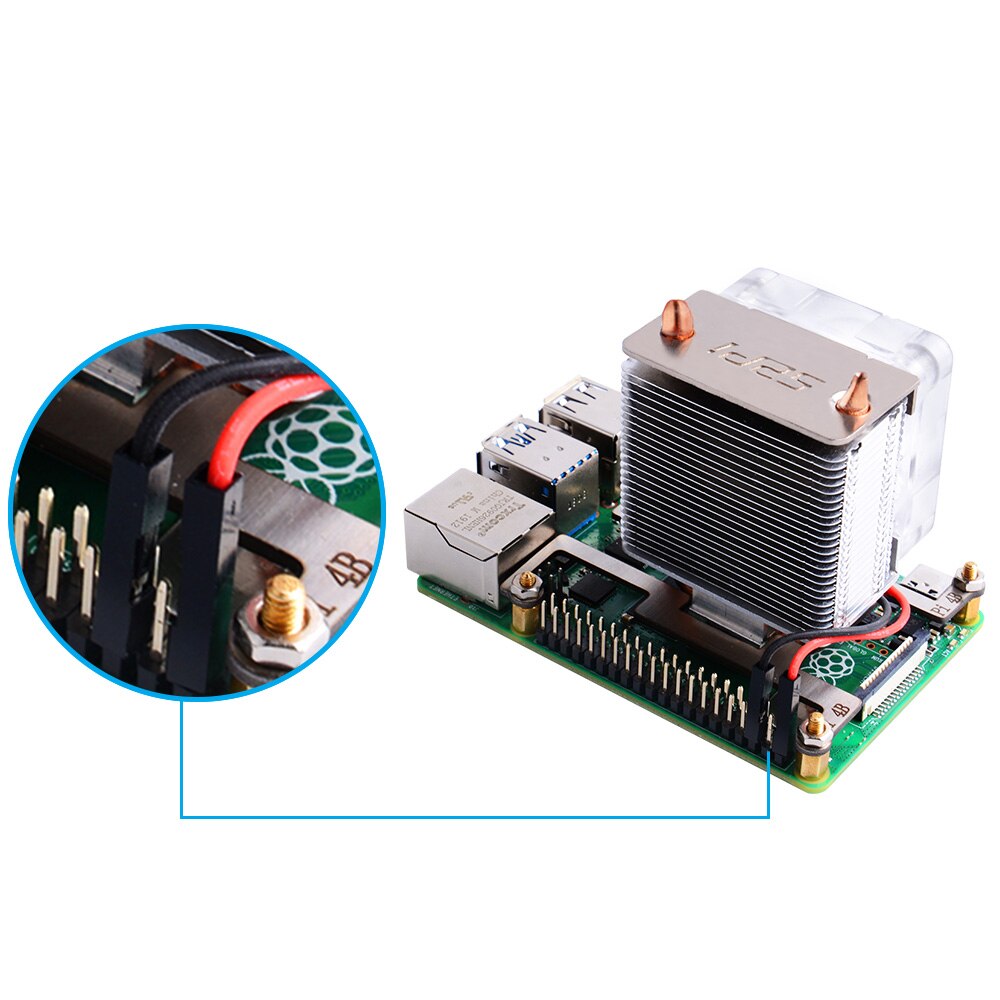
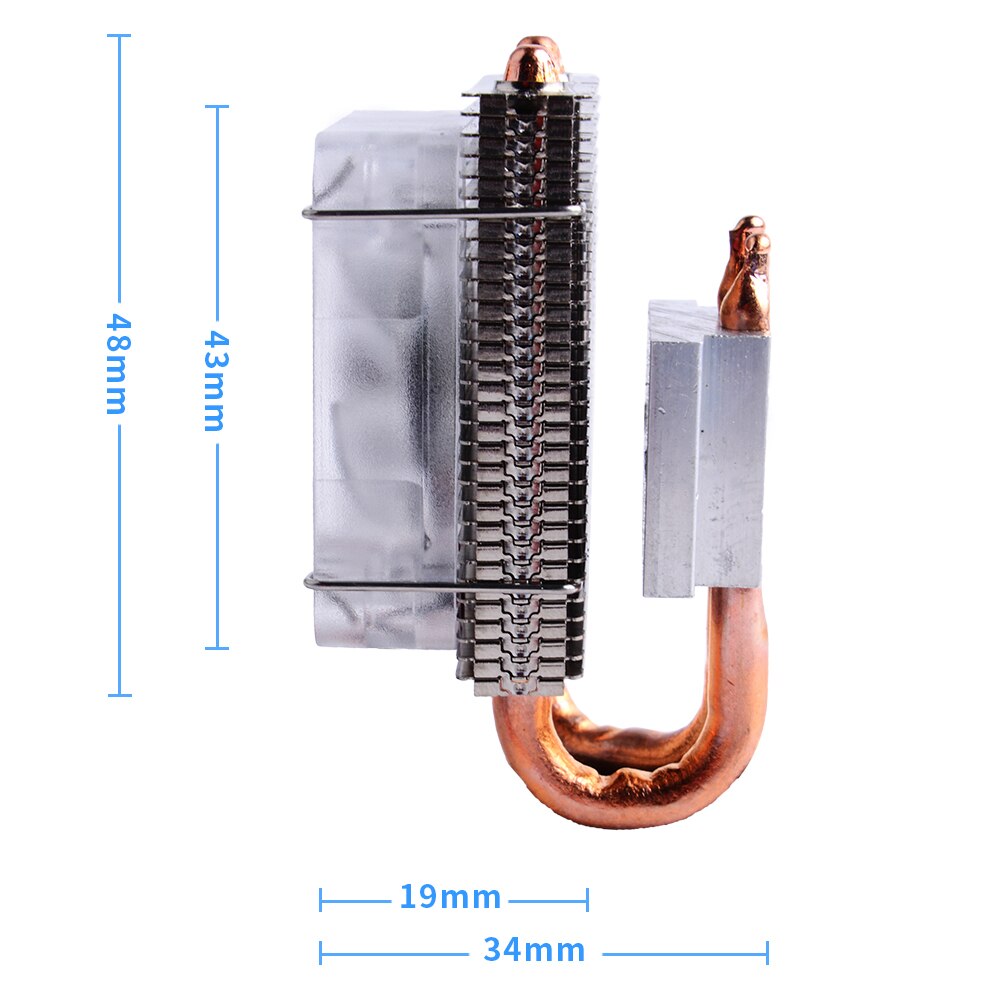
The ICE Tower CPU Cooling Fan is a Raspberry Pi cooler which specially designed for Raspberry Pi 4 Model B, Raspberry Pi 3 Model B+(Plus) and Raspberry Pi 3 Model B to solve the Raspberry Pi heat dissipation problem.
-
This ice tower cooler is tower structure, 5mm copper tube, multi-layer heatsinks, 7 blades powerful fan, all the above combinations make this super radiator for Raspberry Pi.
-
In the case of overclocking, this cooling fan with heatsink can reduce the temperature of the Raspberry Pi from 80℃ to 40℃.
-
When the fan turns on, there will be 7 colors show up, it looks very beautiful.
-
DC 5V Power in (Powered by the Raspberry Pi)
-
Ice Tower Structure
-
5mm copper tube
-
Super heat dissipation function
-
Rated power 0.4W @5V, 0.08A
-
Super Cool fan background light (7 Colors)
-
Very easy to setup
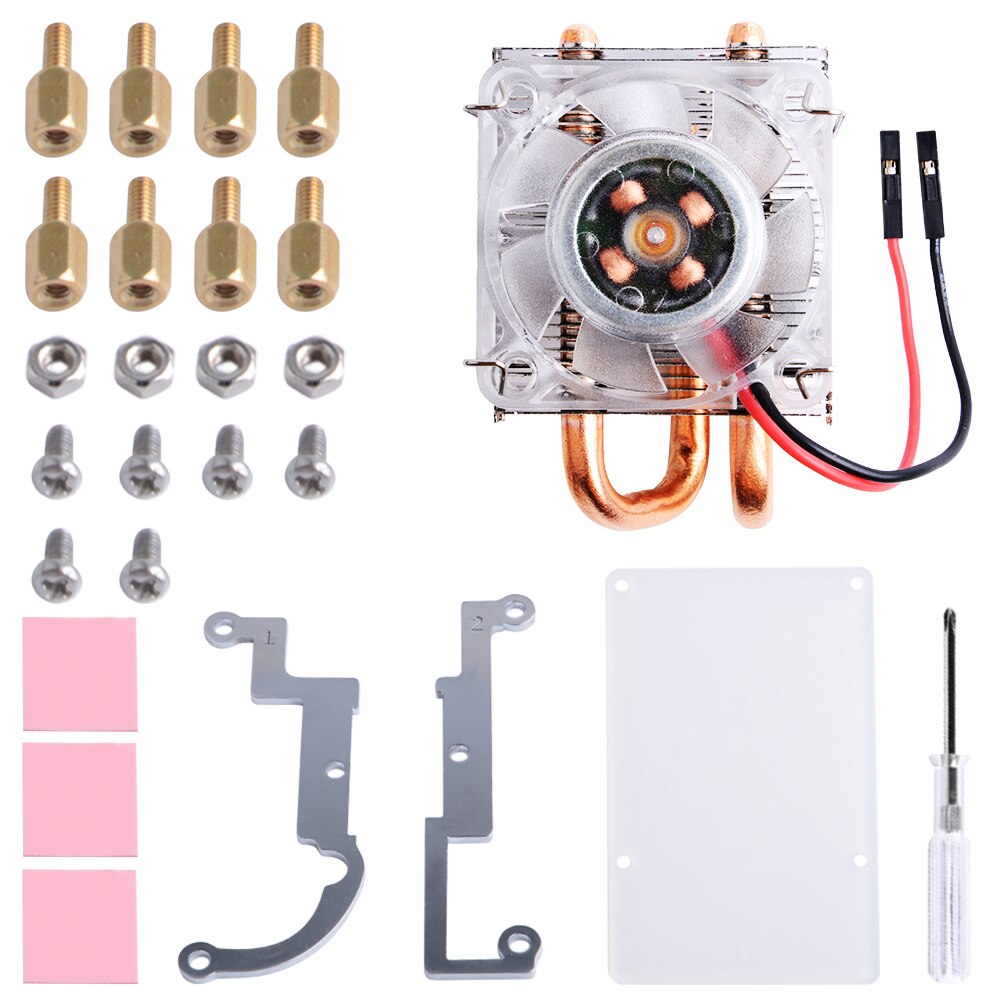
Bundle1:
-
1 x Ice Tower Radiator and Fan
-
2 x Steel Mounting Fixer (Fit for Raspberry Pi 3B+)
-
2 x Steel Mounting Fixer (Fit for Raspberry Pi 4B)
-
2 x M2x4 Screws
-
4 x M2.5x6 Copper sticks
-
4 x M2.5 Nuts
-
4 x M2.5x4 screws
-
3 x Thermal Tape
-
1 x Screw Driver
-
1 x Acrylic Bracket