Lonten Tech
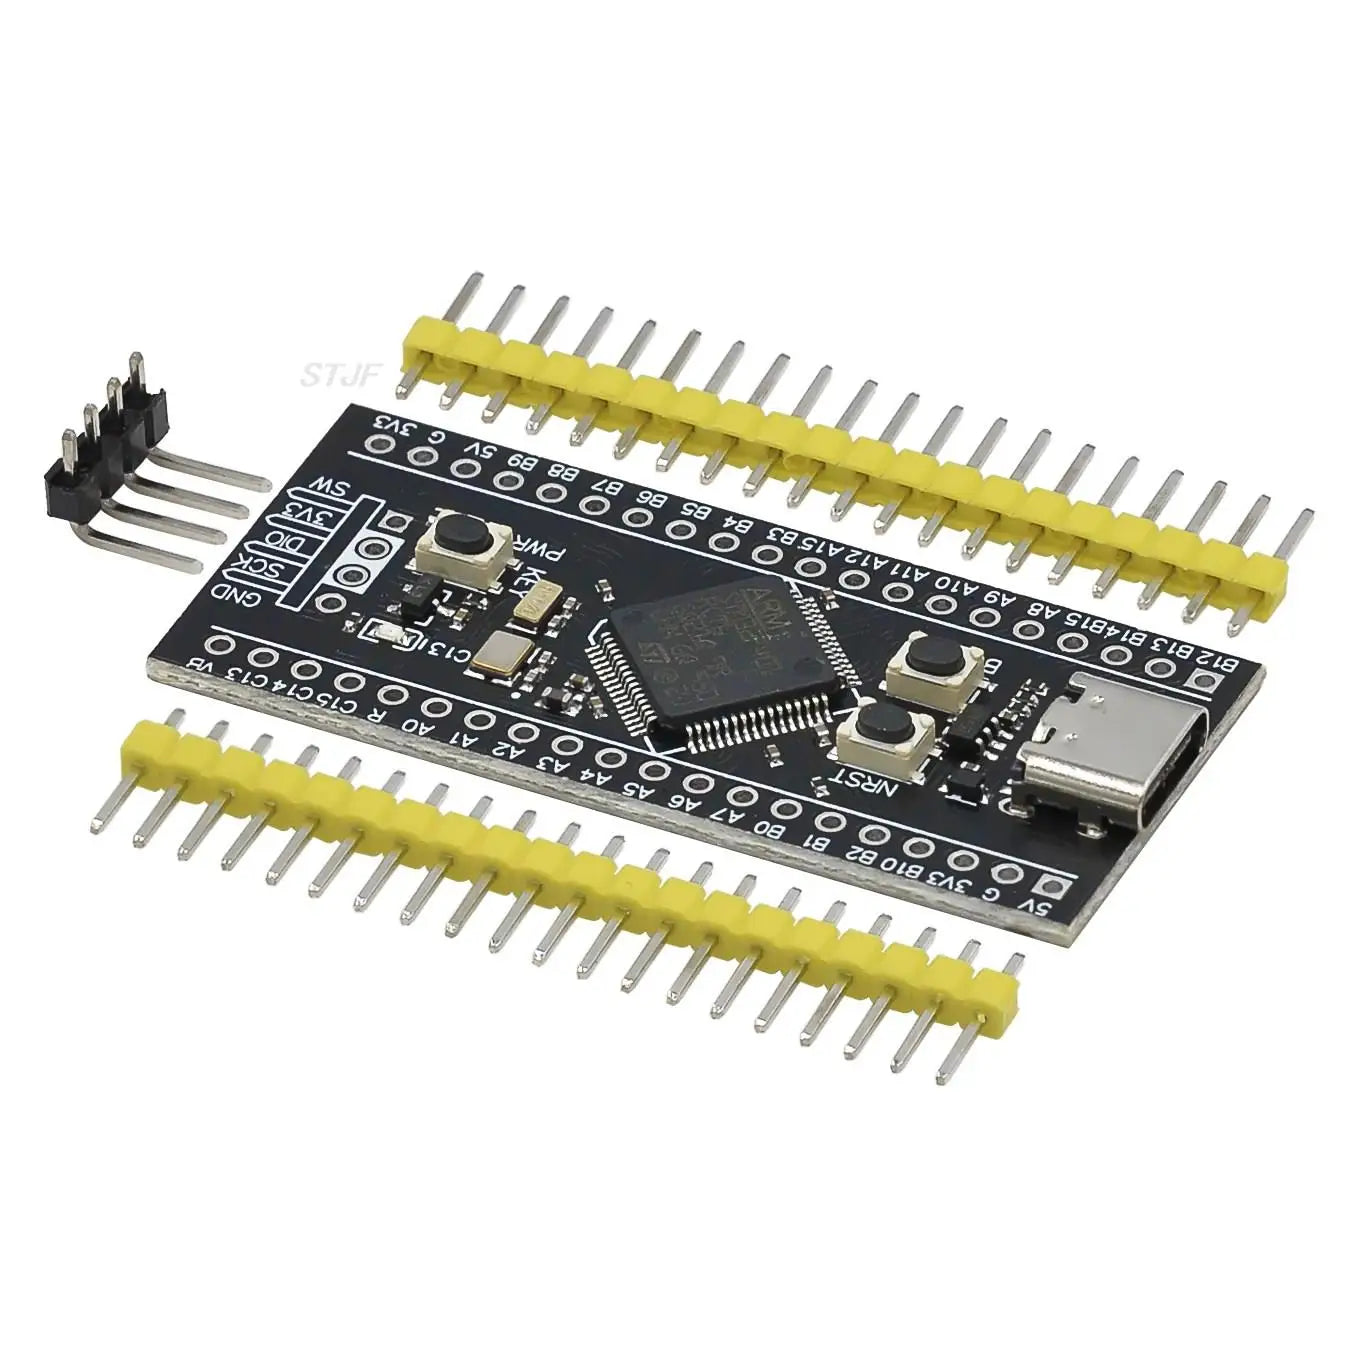
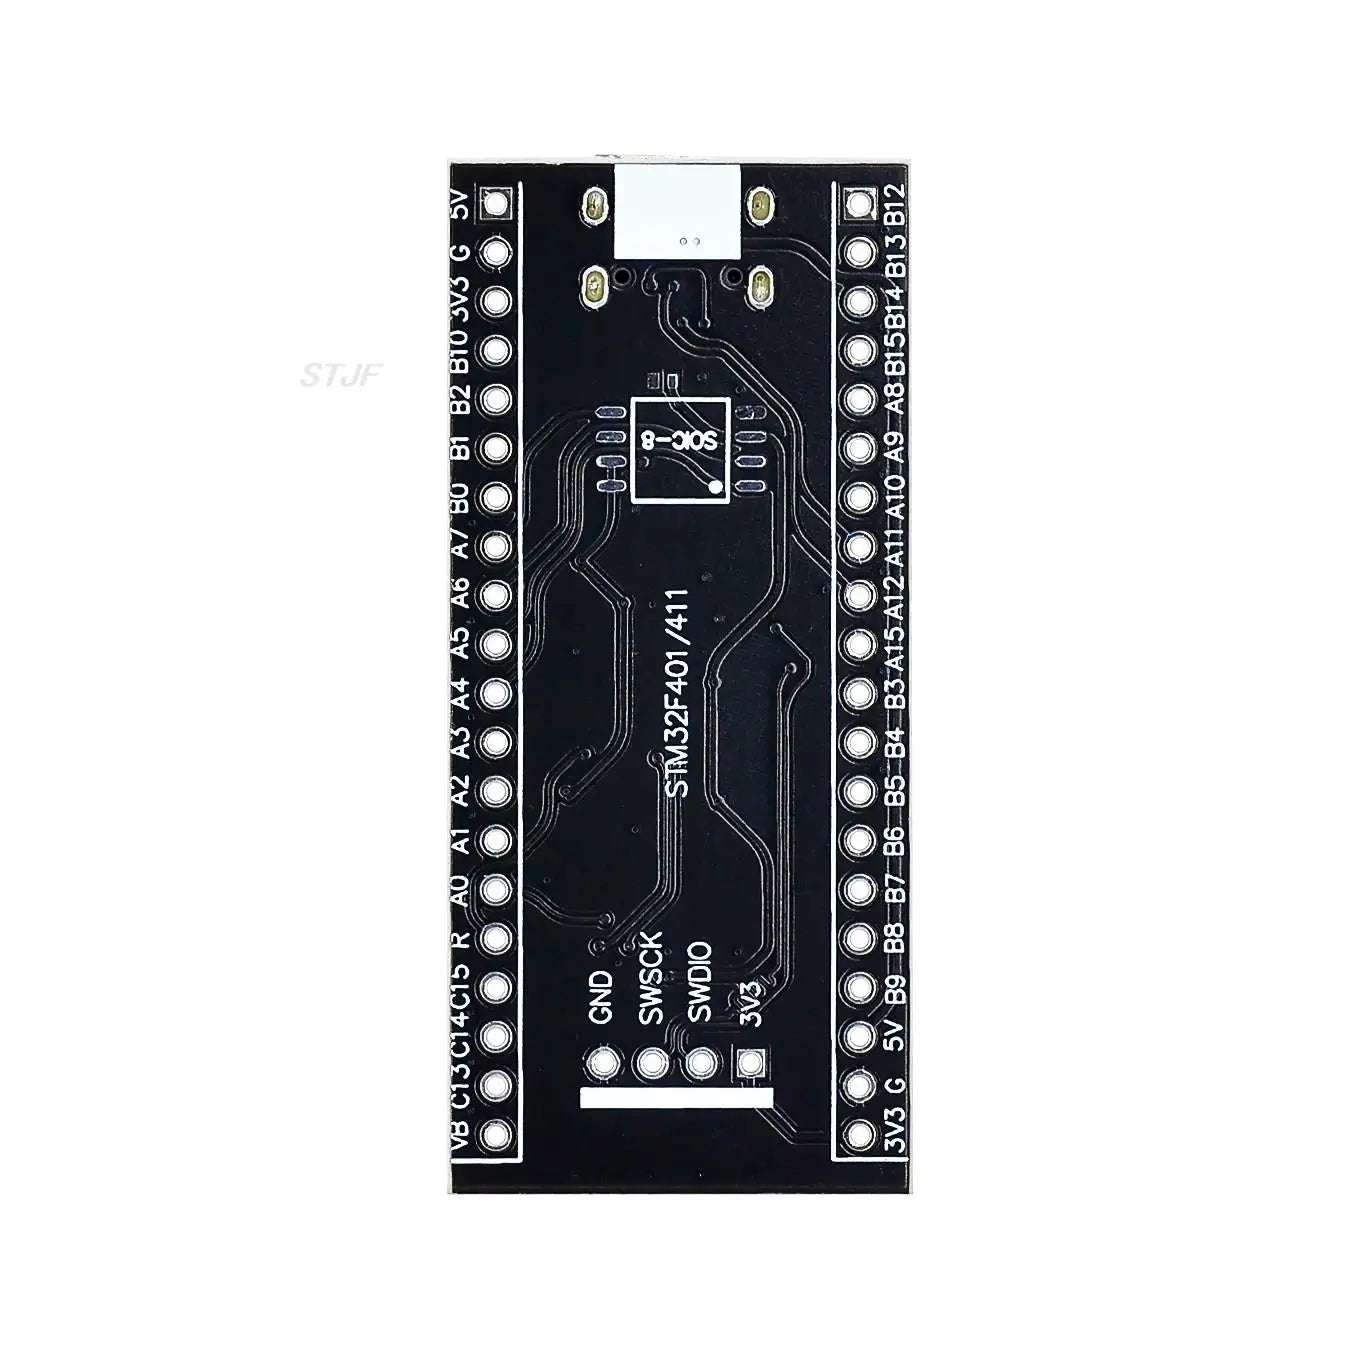
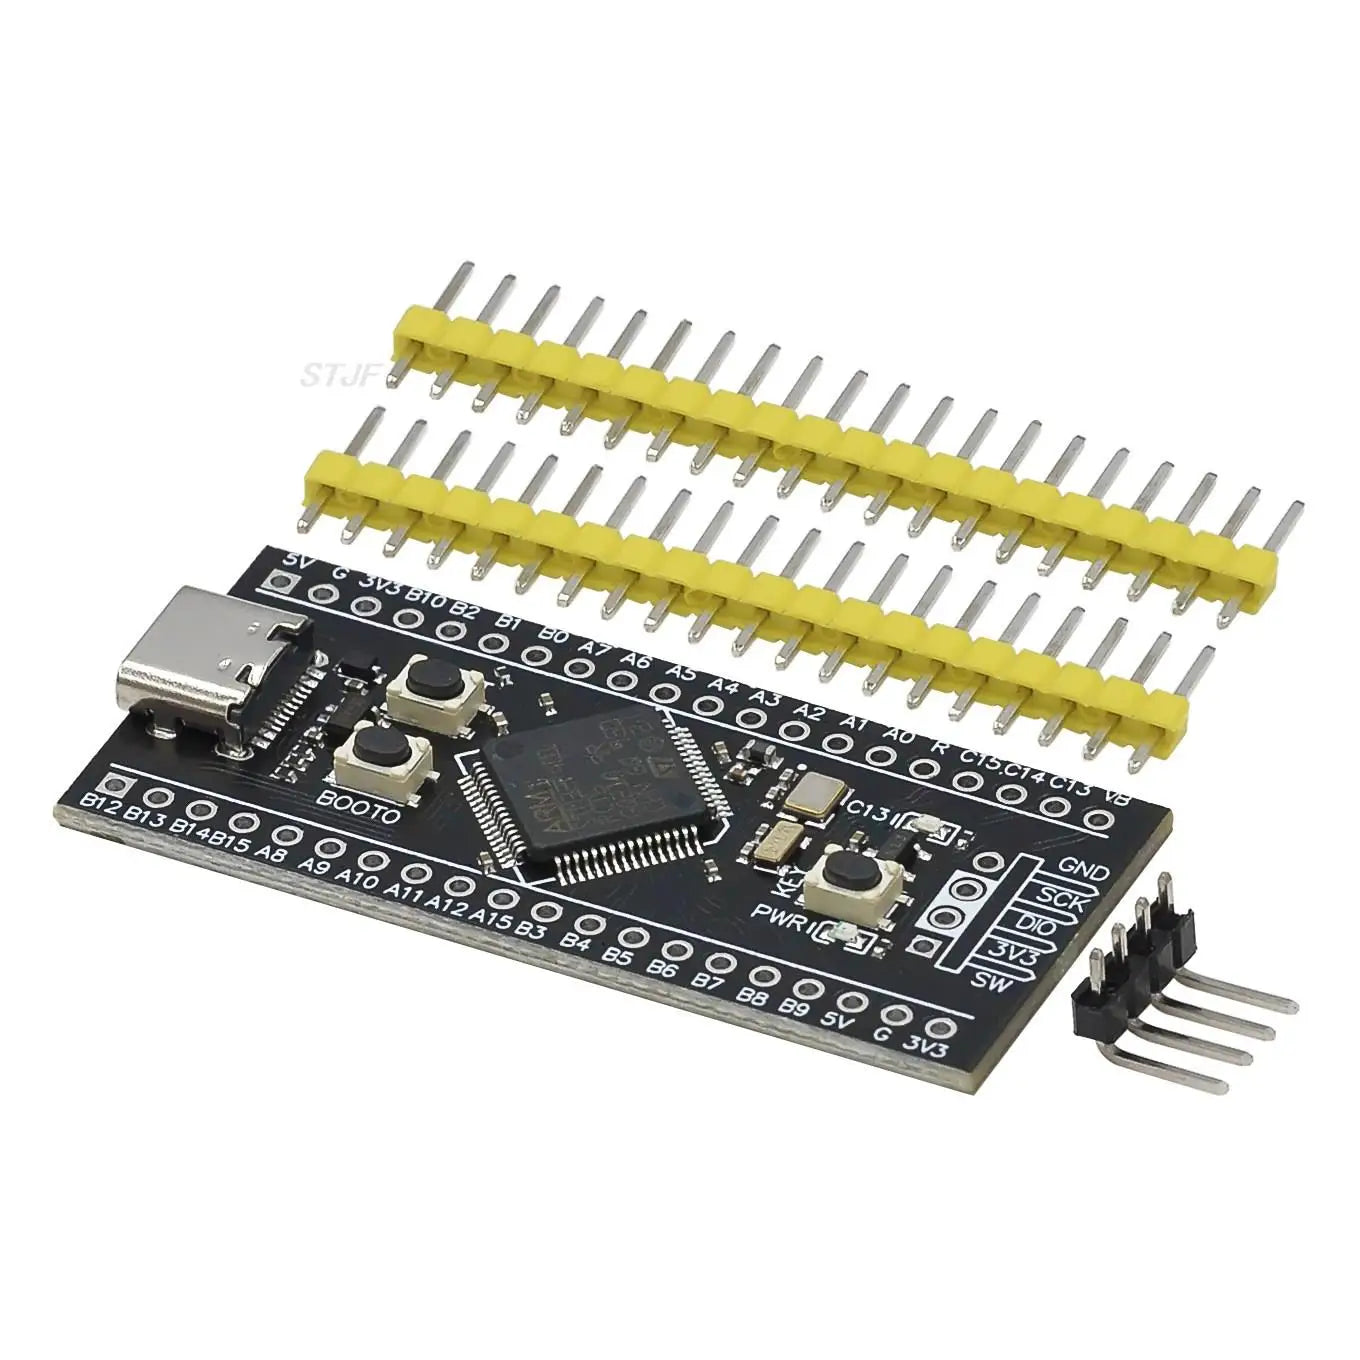
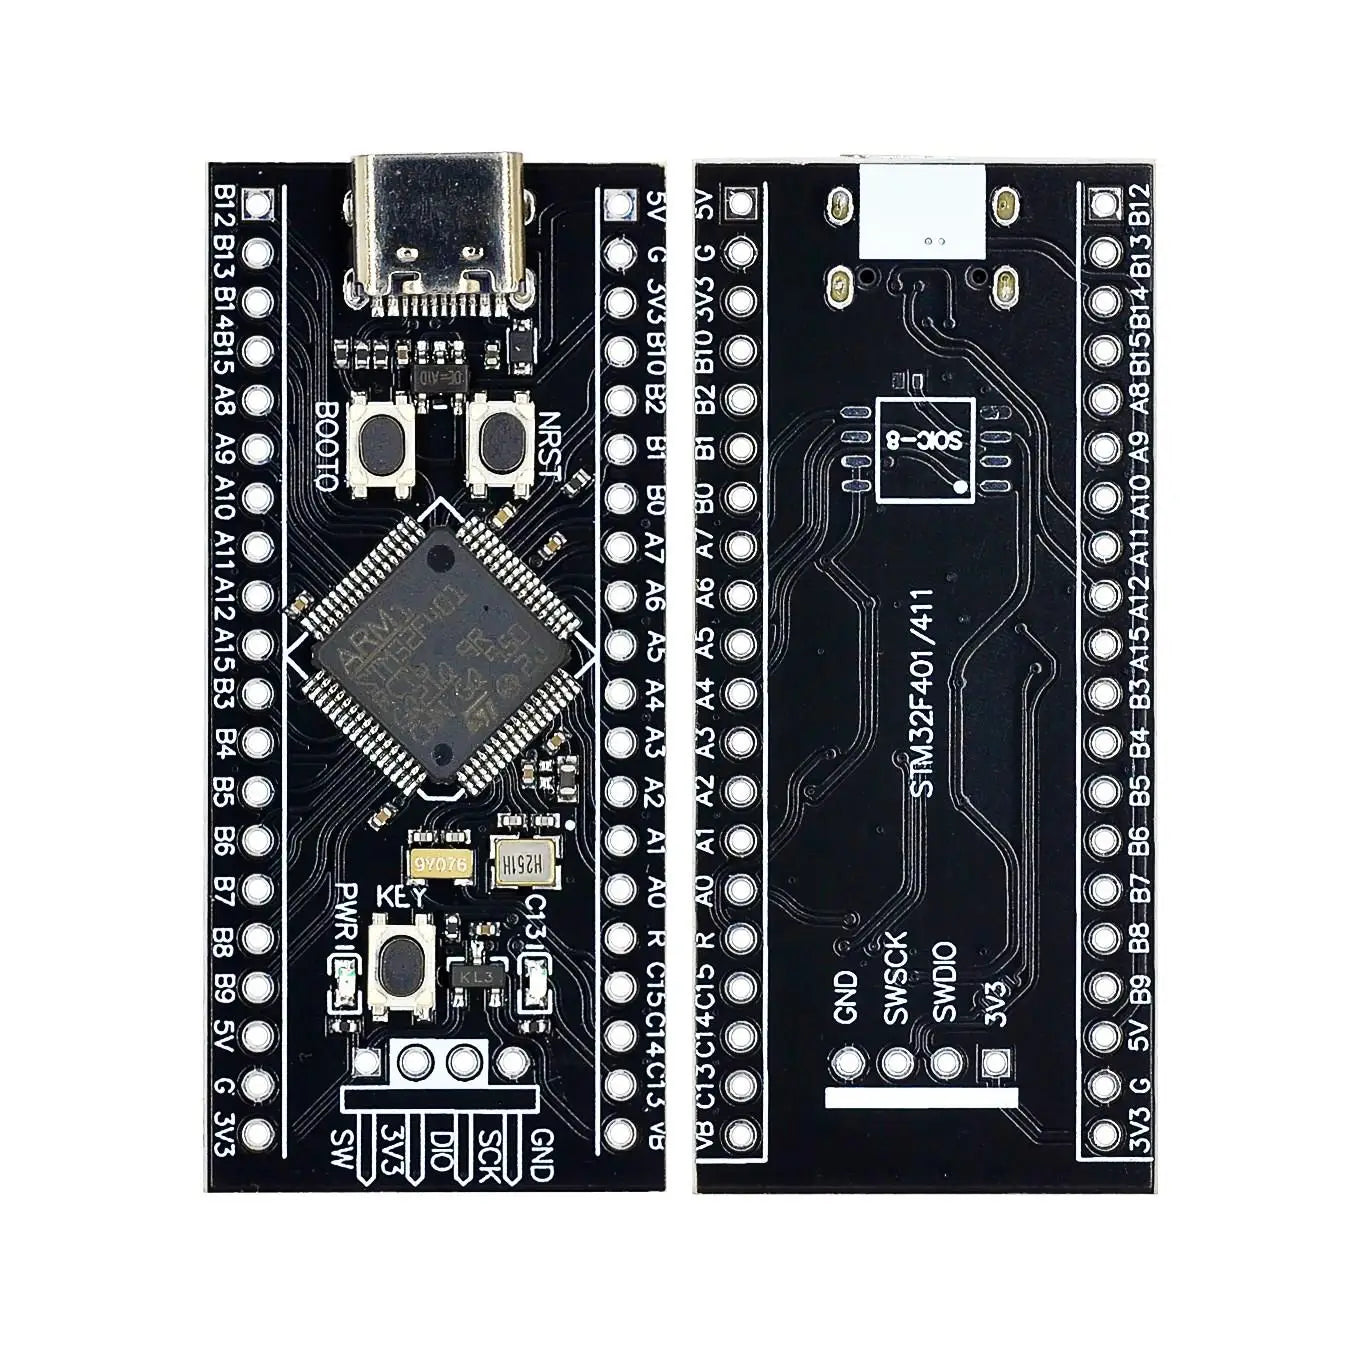
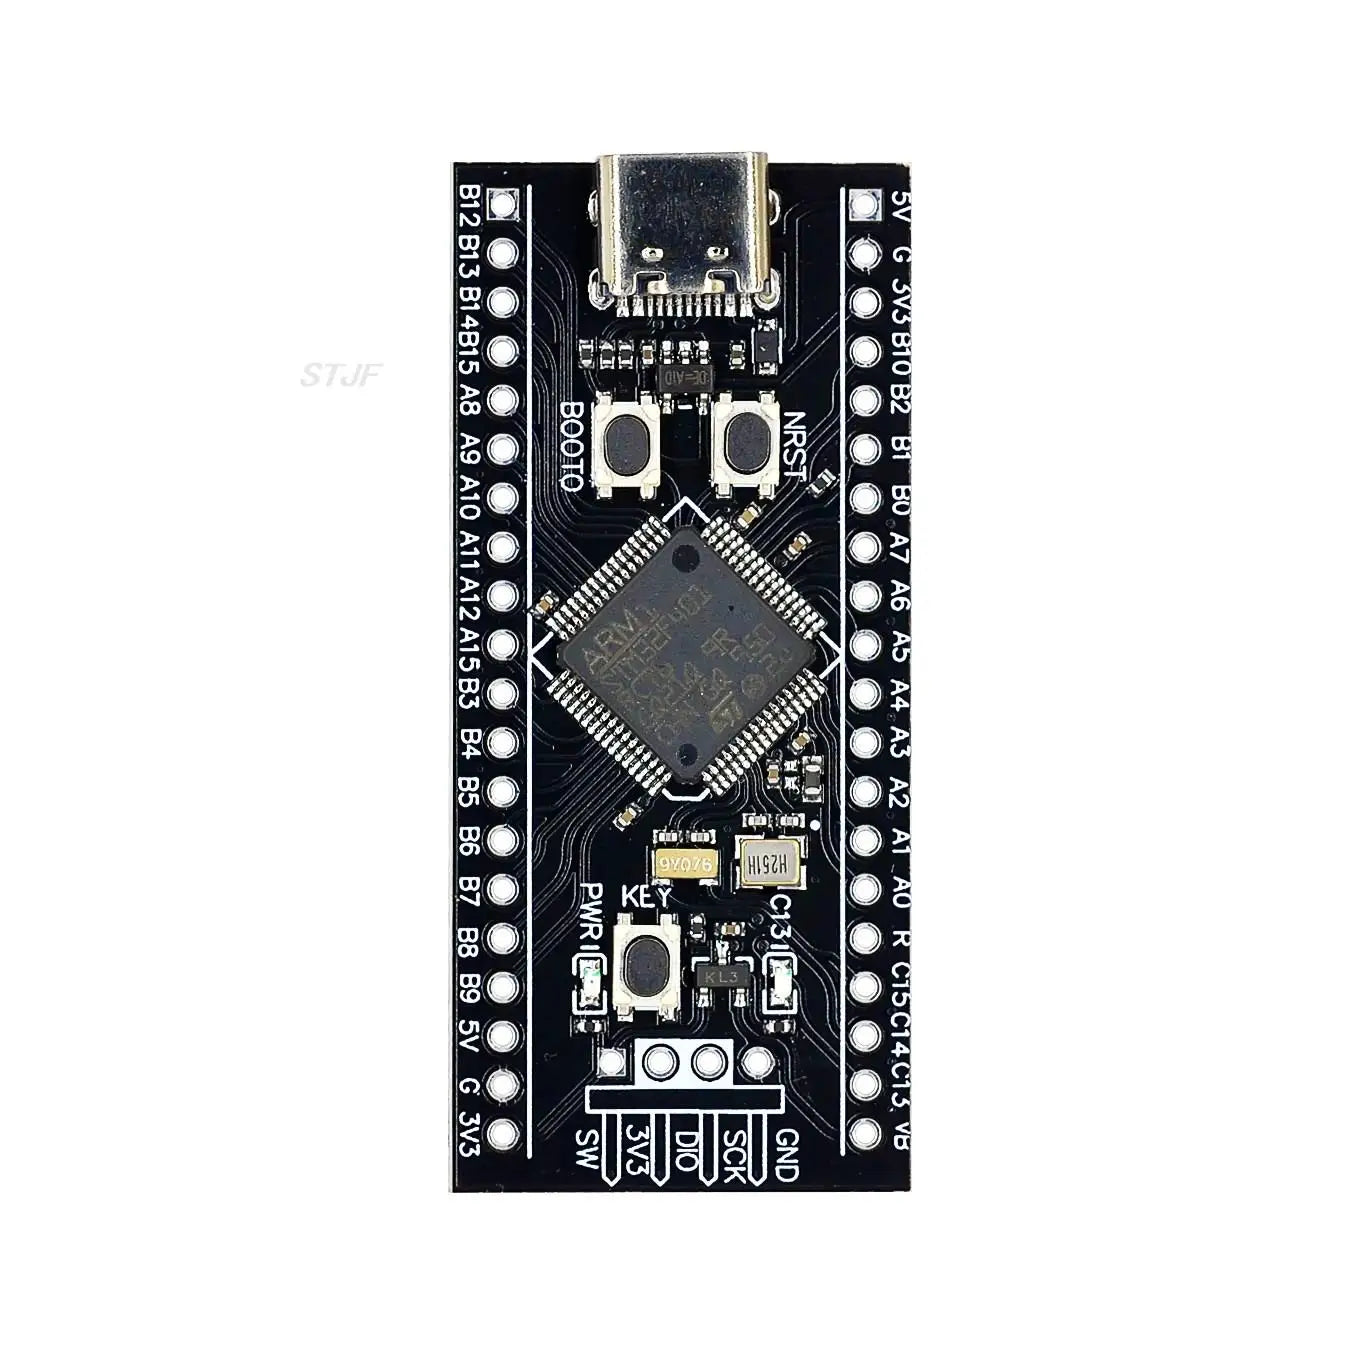
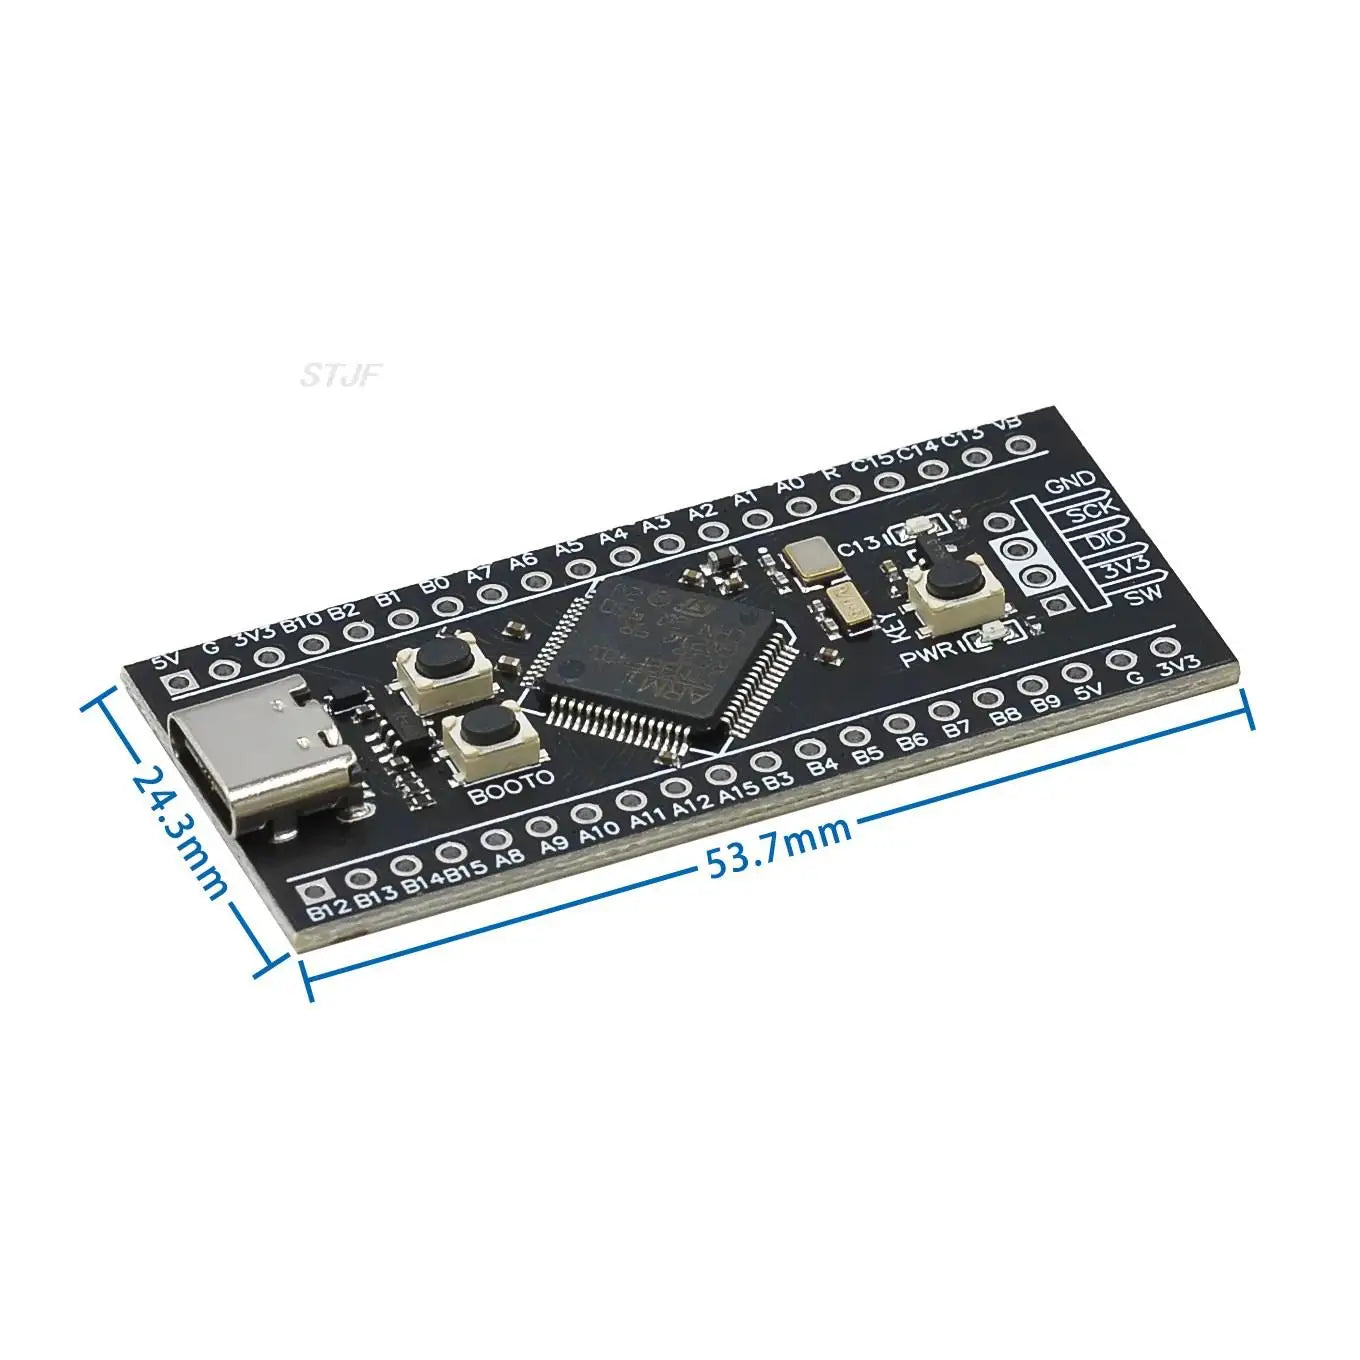
Custom STM32F401RCT6 / STM32F401CCU6 core board system board MicroPython development board
Custom STM32F401RCT6 / STM32F401CCU6 core board system board MicroPython development board
Couldn't load pickup availability
The new version of STM32F401RCT6 development board is fully compatible with the old version of STM32F401CCU6, the difference lies in the chip package is different, can be directly replaced.
Data download links: https://pan.baidu.com/s/16JkaaW5h65oxxe4guZp1ew extraction code: d192
STM32 burn download instructions: https://www.weact-tc.cn/2019/11/30/STM32Download/
Part MicroPython tutorial: https://www.weact-tc.cn/2020/01/01/micropython/
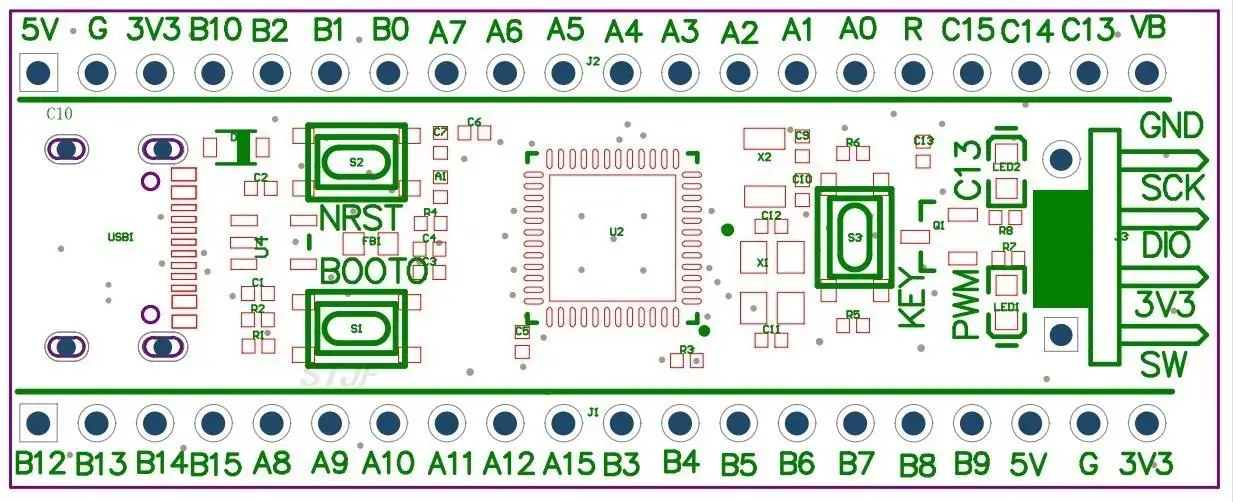
ISP mode download
Method 1: Press and hold the BOOT0 key and Reset key during power-on, then release the reset key and release the BOOT0 key after 0.5 seconds
Method 2: In power-off state, hold down the BOOT0 key and release BOOT0 for 0.5S after power-on
The USB data cable is connected to the TYPE-C interface of MCU, and the serial port is connected to PA9 and PA10. STM32CubeProg and WeAct Studio Download Tool are recommended for downloading software
Serial port download
USB to serial port (ex. : CH340) TX-PA10, RX-PA9, and do not connect MCU Type-C to the computer, must use external power supply, otherwise it will affect MCU download
Use STM32CubeProgammer for serial port download
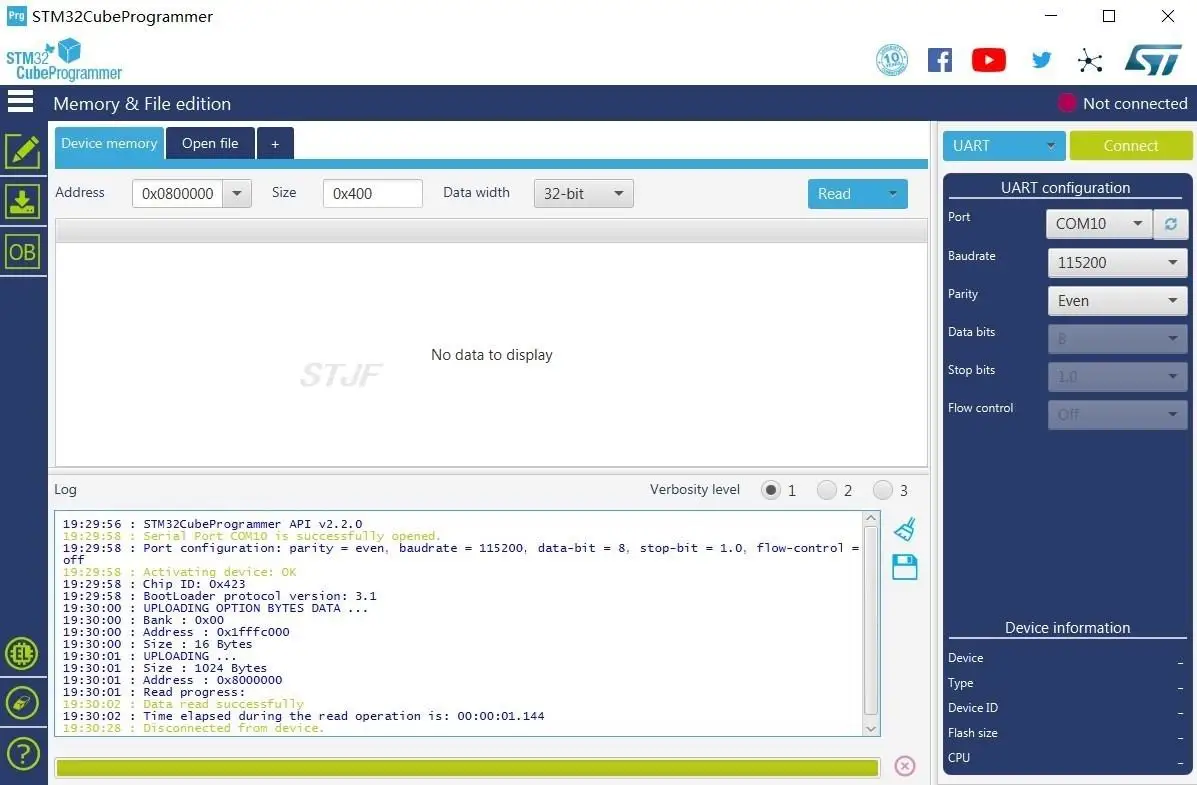

USB download (DFU download)
1.STM32CubeProgrammer Select USB mode and WeAct Studio Download Tool. Double-click WeAct Studio USB Download Tool.bat and perform operations as prompted
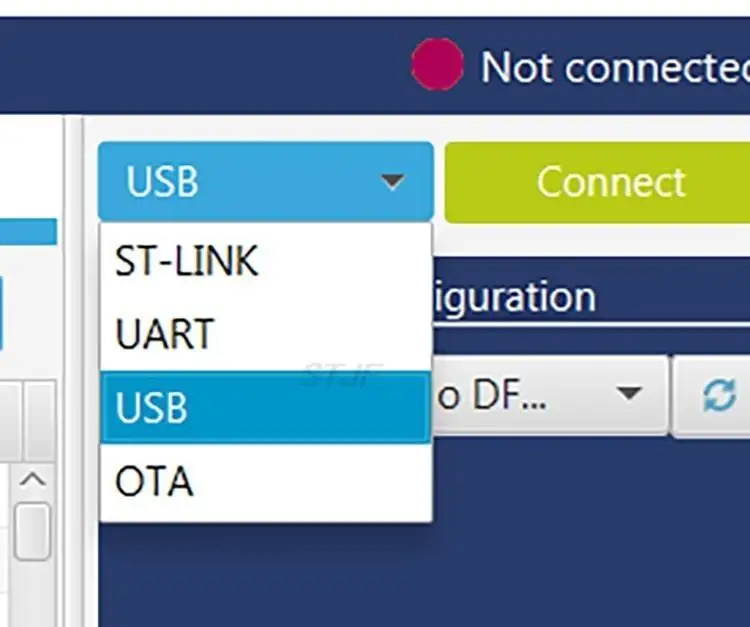
1.MCU enters ISP mode and connects computer with USB data cable
2. Select the firmware and perform other operations the same as downloading through the serial port
Device Manager -> Universal Serial Bus device STM32 Bootloader or DFU in FS Mode device appears
If STM Device in DFU Mode is displayed, right-click the device and select Delete the Driver software of the device. Then install the driver in WeAct Studio Download Tool/DFU_Driver/Driver/ directory. Select STM32Bootloader.inf and right-click Install
The USB download may be unstable due to weather conditions. For example, if the following ERROR occurs repeatedly or the device cannot be identified, use a serial port and disconnect the USB connection.
| 1 2 | Error: failed to download Segment[0] Error: failed to download the File |
The reasons for the above ERROR are as follows: the room temperature is low and HSI deviation occurs. USB download uses external high-speed crystal oscillator, while ISP program (bootstrap program of ST) measures HSE frequency of external crystal oscillator through HSI and then configure clock. When HSI deviation is too large, HSE measurement frequency is incorrect, resulting in incorrect USB timing and download error. For details see Web disk/general documentation /AN2606 STM32 microcontroller system memory bootstrap mode.pdf
Solution: Properly heat MCU to more than 25°C (hand heat)
Connect the SW port of STM32:
SW interface
GND
SCK
DIO
3.3 V
Click the download button in MDK software or select ST-Link in STM32CubeProg and follow the prompts.
CubeMX project or library project, to enable SW debug interface, otherwise the debugger is unable to identify MCU
Code engineering crystal oscillator setting is wrong or other anomalies cause the debugger can not identify MCU, at this time manually set MCU into ISP mode, the debugger can identify MCU, then click download
ISP mode is just a piece of startup code solidialized in MCU by ST company. Check the BOOTx Settings, run mode jumps to address 0x08000000, and download mode waits for download command. At this time, the SW debug download interface is open, and the debugger can read and download MCU code.
JTAG interface transfer SW interface TMS SWDIO TCK SWCLK VTEST 1 pin Some Jlinks need to connect to 3.3V to recognize the MCU 3.3V 3.3V 3.3V GND - Debugging interfaces are classified into SW interfaces and JTAG interfaces. The ARM debugger supports the SW interface
- JLink can be connected to the chip, but cannot be downloaded, please upgrade the Jlink driver to a new version, V6.50a test is available

- WeAct_HID_FW_Bootloader download
- Click me to download the software
- Only the STM32F4 series core board is supported
- STM32F401CC, STM32F401CE, STM32F411CE core board can be used, similar to 51 MCU download, but no serial port, only one data cable,
- And modify the Keil project in two places (see video for details). Faster and more convenient than serial port downloads

- APP engineering modification method
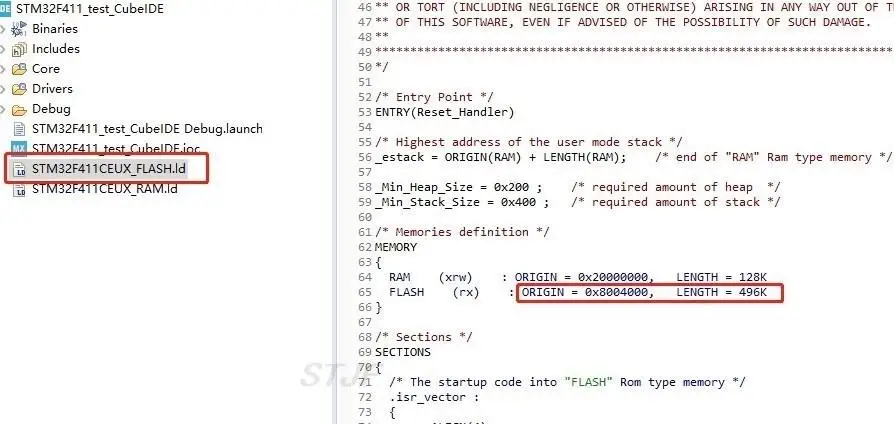
- Example Change the start address of the project ROM to 0x8004000
- STM32CubeIDE setting

- Add the following code at the beginning of main()
- 1 SCB->VTOR = FLASH_BASE 0x4000;
-
Software use procedure
The core board is connected to the computer with a data line, and WeAct HID devices appear
Press and hold the KEY key to power on or reset the Bootloader
Select Firmware and click "Download Firmware" to complete the download
The selected firmware is updated when KEIL is recompiled without re-selection
The Bootloader method is displayed
Press and hold the <KEY key >, power on or reset, and the C13 LED flashes to release
To enter the Bootloader, refer to the stm32f401_test_APP 0x8004000.zip project
- In the Bootloader
- Click/double click <KEY > for C13 LED on and off
- The SW debug port is open. You can use the debugger to burn data without entering the DFU mode
Exit the Bootloader method
Reset MCU, reset key/upper computer click <MCU reset >
Long press <KEY >, C13 LED flash to release
Note:
When Bootloader is burned for the first time, MCU will not run down, and C13 LED 200MS flashes, just reset MCU again
Bootloader and APP burning software source are not open
Share
